Discover 15 easy and creative upcycled DIY projects to transform your furniture. Get inspired and give your home a stylish makeover today!
Looking to give your furniture a fresh new look? Look no further – we’ve got 15 upcycled DIY projects that anyone can do.
Revamp that old dresser with a coat of paint, or transform a plain table into a statement piece with decoupage.
How about reupholstering a worn-out chair for a brand new look? And don’t forget to repurpose that wooden pallet into a stylish coffee table.
With these easy projects, you’ll be able to give your furniture a makeover in no time.
Revamp an Old Dresser With a Fresh Coat of Paint
You can easily transform an old dresser by giving it a fresh coat of paint. It’s a simple and cost-effective way to revamp your furniture and breathe new life into your space.
First, start by cleaning the dresser thoroughly to remove any dirt or grime. Then, lightly sand the surface to create a smooth base for the paint to adhere to.
Once the dresser is prepped, choose a paint color that matches your desired style or theme. Apply the paint using a brush or roller, making sure to cover all surfaces evenly.
Allow the paint to dry completely before adding a second coat if needed. Finally, finish off the transformation by adding new hardware or decorative elements.
With just a few steps, you can give your old dresser a fresh and modern look that will impress anyone who sees it.
Transform a Plain Table Into a Statement Piece With Decoupage
Transforming a plain table into a statement piece with decoupage is a creative and budget-friendly way to add personality to your home decor.
You can easily give your table a new look by using decoupage techniques. Start by choosing a design or pattern that speaks to your style. It could be anything from floral prints to vintage maps or even comic book pages.
Next, gather your supplies, including Mod Podge, a foam brush, and your chosen materials for decoupage. Apply a layer of Mod Podge to the surface of your table, then carefully place your chosen material on top. Smooth out any wrinkles or bubbles and let it dry.
Finish it off with a few more coats of Mod Podge for durability. In no time, you’ll have a unique and eye-catching table that will impress your guests and add a personal touch to your space.
Reupholster a Worn-Out Chair for a Brand New Look
Reupholstering a worn-out chair can give it a brand new look and breathe new life into your furniture.
If you have a chair that has seen better days, don’t throw it away just yet. With a little bit of time and effort, you can transform it into a beautiful piece that will enhance the overall look of your space.
Start by choosing a fabric that matches your style and the existing decor. Then, carefully remove the old upholstery, making sure to save any necessary pieces for reference.
Next, cut and attach the new fabric, pulling it taut and securing it with staples or upholstery nails. Finally, trim any excess fabric and reattach any necessary hardware.
In no time, you’ll have a chair that looks as good as new!
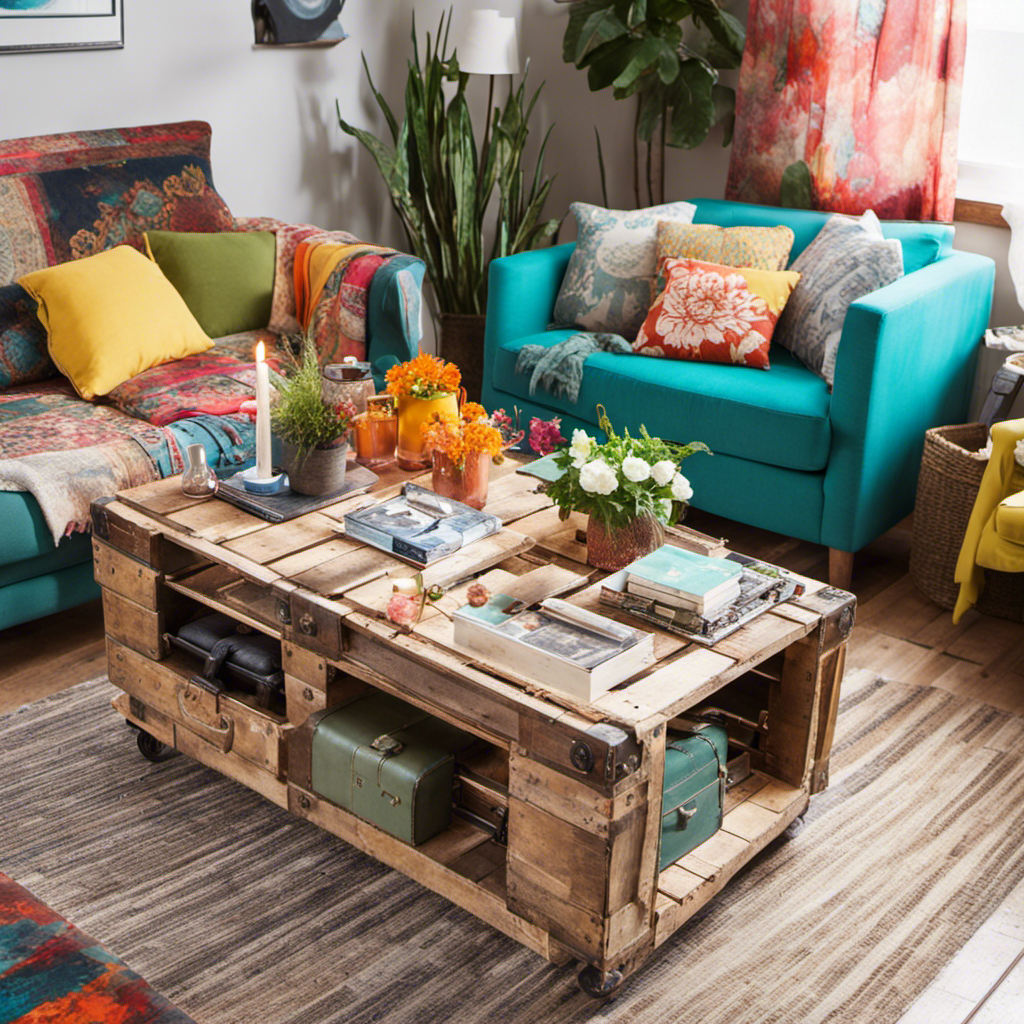
Repurpose a Wooden Pallet Into a Stylish Coffee Table
Repurposing a wooden pallet into a stylish coffee table can add a unique and rustic touch to your living space. It’s a simple and affordable DIY project that anyone can do.
Start by sourcing a pallet, which can usually be found for free or at a low cost. Then, clean and sand the pallet to remove any dirt or rough edges.
Next, apply a coat of paint or stain to match your desired aesthetic. Once dry, attach legs or wheels to the bottom of the pallet for stability and mobility.
Create a Unique Bookshelf Using Repurposed Crates
Using repurposed crates, you can easily create a unique bookshelf that adds character to any room. Instead of spending a fortune on a store-bought bookshelf, why not get creative and make one yourself?
Start by gathering a few old wooden crates, which you can easily find at thrift stores or online marketplaces. Clean them up and give them a fresh coat of paint or stain to match your room’s decor.
Arrange the crates in a way that suits your style and desired height. Securely attach them to each other using screws or brackets. Once assembled, you can place your books, plants, or decorative items on the shelves.
Not only will you have a functional bookshelf, but you’ll also have a unique piece of furniture that showcases your creativity.
Give an Outdated Mirror a Modern Makeover With Metallic Paint
To give your outdated mirror a modern makeover, start by selecting a metallic paint color that complements your decor. Choose a shade that will add a touch of sophistication and elegance to your space.
Once you have the perfect color, prepare your mirror for painting by cleaning it thoroughly and removing any dust or dirt. Next, apply a primer to ensure that the paint adheres properly to the surface.
After the primer has dried, it’s time to start painting. Use smooth, even strokes to apply the metallic paint, making sure to cover the entire surface. Allow the paint to dry completely before adding a second coat if needed.
Turn an Old Ladder Into a Trendy Storage Solution
You can easily transform an old ladder into a trendy storage solution by repainting it in a bold color and adding stylish baskets or shelves to the rungs.
First, choose a color that matches your décor and gives the ladder a modern look. Then, sand the ladder to remove any rough spots or old paint. Apply a coat of primer and let it dry before applying the main color.
Once the ladder is painted, attach baskets or shelves to the rungs using screws or strong adhesive. These can be used to store books, plants, or other decorative items.
Hang the ladder on the wall or lean it against a corner to create a unique and functional storage piece that adds style to any room.
Upcycle an Empty Wine Bottle Into a Chic Vase
The empty wine bottle can easily be transformed into a chic vase with a few simple steps.
First, gather all the necessary materials: an empty wine bottle, spray paint in a color of your choice, and some decorative embellishments like ribbon or twine.
Start by cleaning the bottle thoroughly and removing any labels.
Then, apply a few coats of spray paint to the bottle, ensuring even coverage.
Allow the paint to dry completely before adding any embellishments.
Once the paint is dry, you can wrap the bottle with ribbon or twine, or even add some decorative gems or beads.
Be creative and personalize your vase to fit your own style.
In no time, you’ll have a stylish and unique vase to display your favorite flowers.
Transform a Vintage Suitcase Into a Stylish Side Table
Now that you’ve learned how to upcycle an empty wine bottle into a chic vase, let’s move on to another exciting project: transforming a vintage suitcase into a stylish side table.
This DIY project is a great way to repurpose an old suitcase and add a unique touch to your home decor.
To start, find a vintage suitcase that suits your style. Clean it thoroughly and remove any old stickers or labels.
Next, attach four legs to the bottom of the suitcase using screws or adhesive. You can find pre-made table legs at your local hardware store or get creative and repurpose old chair legs.
Finally, add a glass top or a wooden board to create a sturdy surface for your new side table.
With just a few simple steps, you can transform an old suitcase into a functional and stylish side table that will surely impress your guests.
Repaint and Distress an Old Desk for a Shabby Chic Look
Once you’ve found an old desk that fits your style, it’s time to repaint and distress it for a shabby chic look.
Start by giving the desk a good clean to remove any dust or dirt.
Then, choose a paint color that matches your desired shabby chic aesthetic. Light pastel shades or neutral tones work best for this style.
Apply two coats of paint, allowing each coat to dry completely before applying the next.
Once the paint is dry, it’s time to distress the desk. Use sandpaper to lightly sand the edges and corners of the desk, creating a worn and vintage look. Be sure to focus on areas that would naturally wear over time.
Finally, seal the desk with a clear coat to protect the paint and give it a finished look.
With a little time and effort, you can transform your old desk into a beautiful shabby chic piece that adds charm to any room.
Reuse Old Shutters to Make a Charming Headboard
To create a charming headboard, start by repurposing old shutters with a fresh coat of paint that matches your bedroom decor.
Begin by finding old shutters that are the right size for your bed. Clean them thoroughly to remove any dirt or grime. Then, sand down any rough edges or peeling paint to create a smooth surface.
Once the shutters are prepped, choose a paint color that complements your bedroom’s color scheme. Apply a fresh coat of paint to each shutter, making sure to cover all surfaces evenly. Allow the paint to dry completely before attaching the shutters to the wall behind your bed.
Secure them in place using screws or wall anchors, and voila! You now have a unique and charming headboard that adds character to your bedroom.
Convert an Unused Window Frame Into a Rustic Photo Display
If you have an unused window frame, you can easily transform it into a rustic photo display. First, clean the window frame thoroughly, removing any dirt or debris. Then, measure and cut a piece of twine to fit across the frame horizontally. Attach the twine to the frame using small nails or adhesive hooks.
Next, take your miniature clothespins and attach them evenly spaced along the twine. Now, you’re ready to display your favorite photos or artwork. Simply clip them to the twine using the clothespins.
This DIY project not only repurposes an old window frame but also adds a unique and charming touch to any room.
Repurpose Old Drawers Into Functional Wall Shelves
Now that you’ve learned how to turn an unused window frame into a rustic photo display, let’s move on to another fun and creative DIY project.
Have you ever wondered what to do with those old drawers lying around? Well, here’s a great idea for you: repurpose them into functional wall shelves!
It’s a simple yet effective way to give your furniture a makeover and add some extra storage to your space. All you need to do is remove the bottom of the drawer, attach it securely to the wall, and voila! You now have a unique and stylish shelf to display your favorite books, plants, or decorative items.
It’s a project that anyone can do, so why not give it a try and see the transformation for yourself?
Give a Plain Lampshade a Makeover With Fabric or Paint
Ready to transform your plain lampshade into a stylish piece with just some fabric or paint? It’s easier than you think!
First, gather your materials – a lampshade, fabric or paint, scissors, glue or adhesive, and a paintbrush if you’re using paint.
If you choose fabric, measure the height and circumference of your lampshade and cut a piece to size. Apply the adhesive to the back of the fabric and carefully wrap it around the shade, smoothing out any wrinkles.
For paint, start with a clean lampshade and use a brush to apply your chosen color or design. Let it dry completely before putting it back on the lamp.
Voila! Your plain lampshade is now a stylish focal point in any room.
Upcycle an Old Cabinet Door Into a Decorative Serving Tray
Looking to repurpose an old cabinet door? Turn it into a decorative serving tray with just a few simple steps.
Start by cleaning the cabinet door thoroughly to remove any dirt or grime. Then, sand down the surface to create a smooth base for painting or staining.
Next, choose your desired finish and apply it evenly to the cabinet door, allowing it to dry completely. Once the finish is dry, attach handles or knobs to the sides of the door to serve as handles for the tray.
Finally, add a personal touch by decorating the tray with stencils, decals, or even a coat of chalkboard paint for a unique and versatile serving tray.
In just a short time, you can transform an old cabinet door into a stylish and functional centerpiece for your home.
Conclusion
So there you have it, 15 amazing DIY projects to give your furniture a makeover. Whether you’re revamping an old dresser, transforming a plain table, or repurposing old drawers, these projects are perfect for anyone looking to add some creativity and style to their home.
Don’t be afraid to get creative and make these projects your own. With just a little time and effort, you can turn your old furniture into something unique and beautiful.
So why wait? Start upcycling and give your home a fresh new look today!


